We enjoy trying new AI tools and seeing what they can do. ChatGPT’s photo restoration feature caught our eye immediately. We wanted to see if this easy-to-use tool could bring old pictures back to life without needing special skills.
Before, we’ve spent many hours testing different methods – like ControlNet and SDXL – and seeing what works best. This guide shares what we learned so you can fix your old photos too. Whether you have family pictures or historical images, you’ll find helpful tips here.
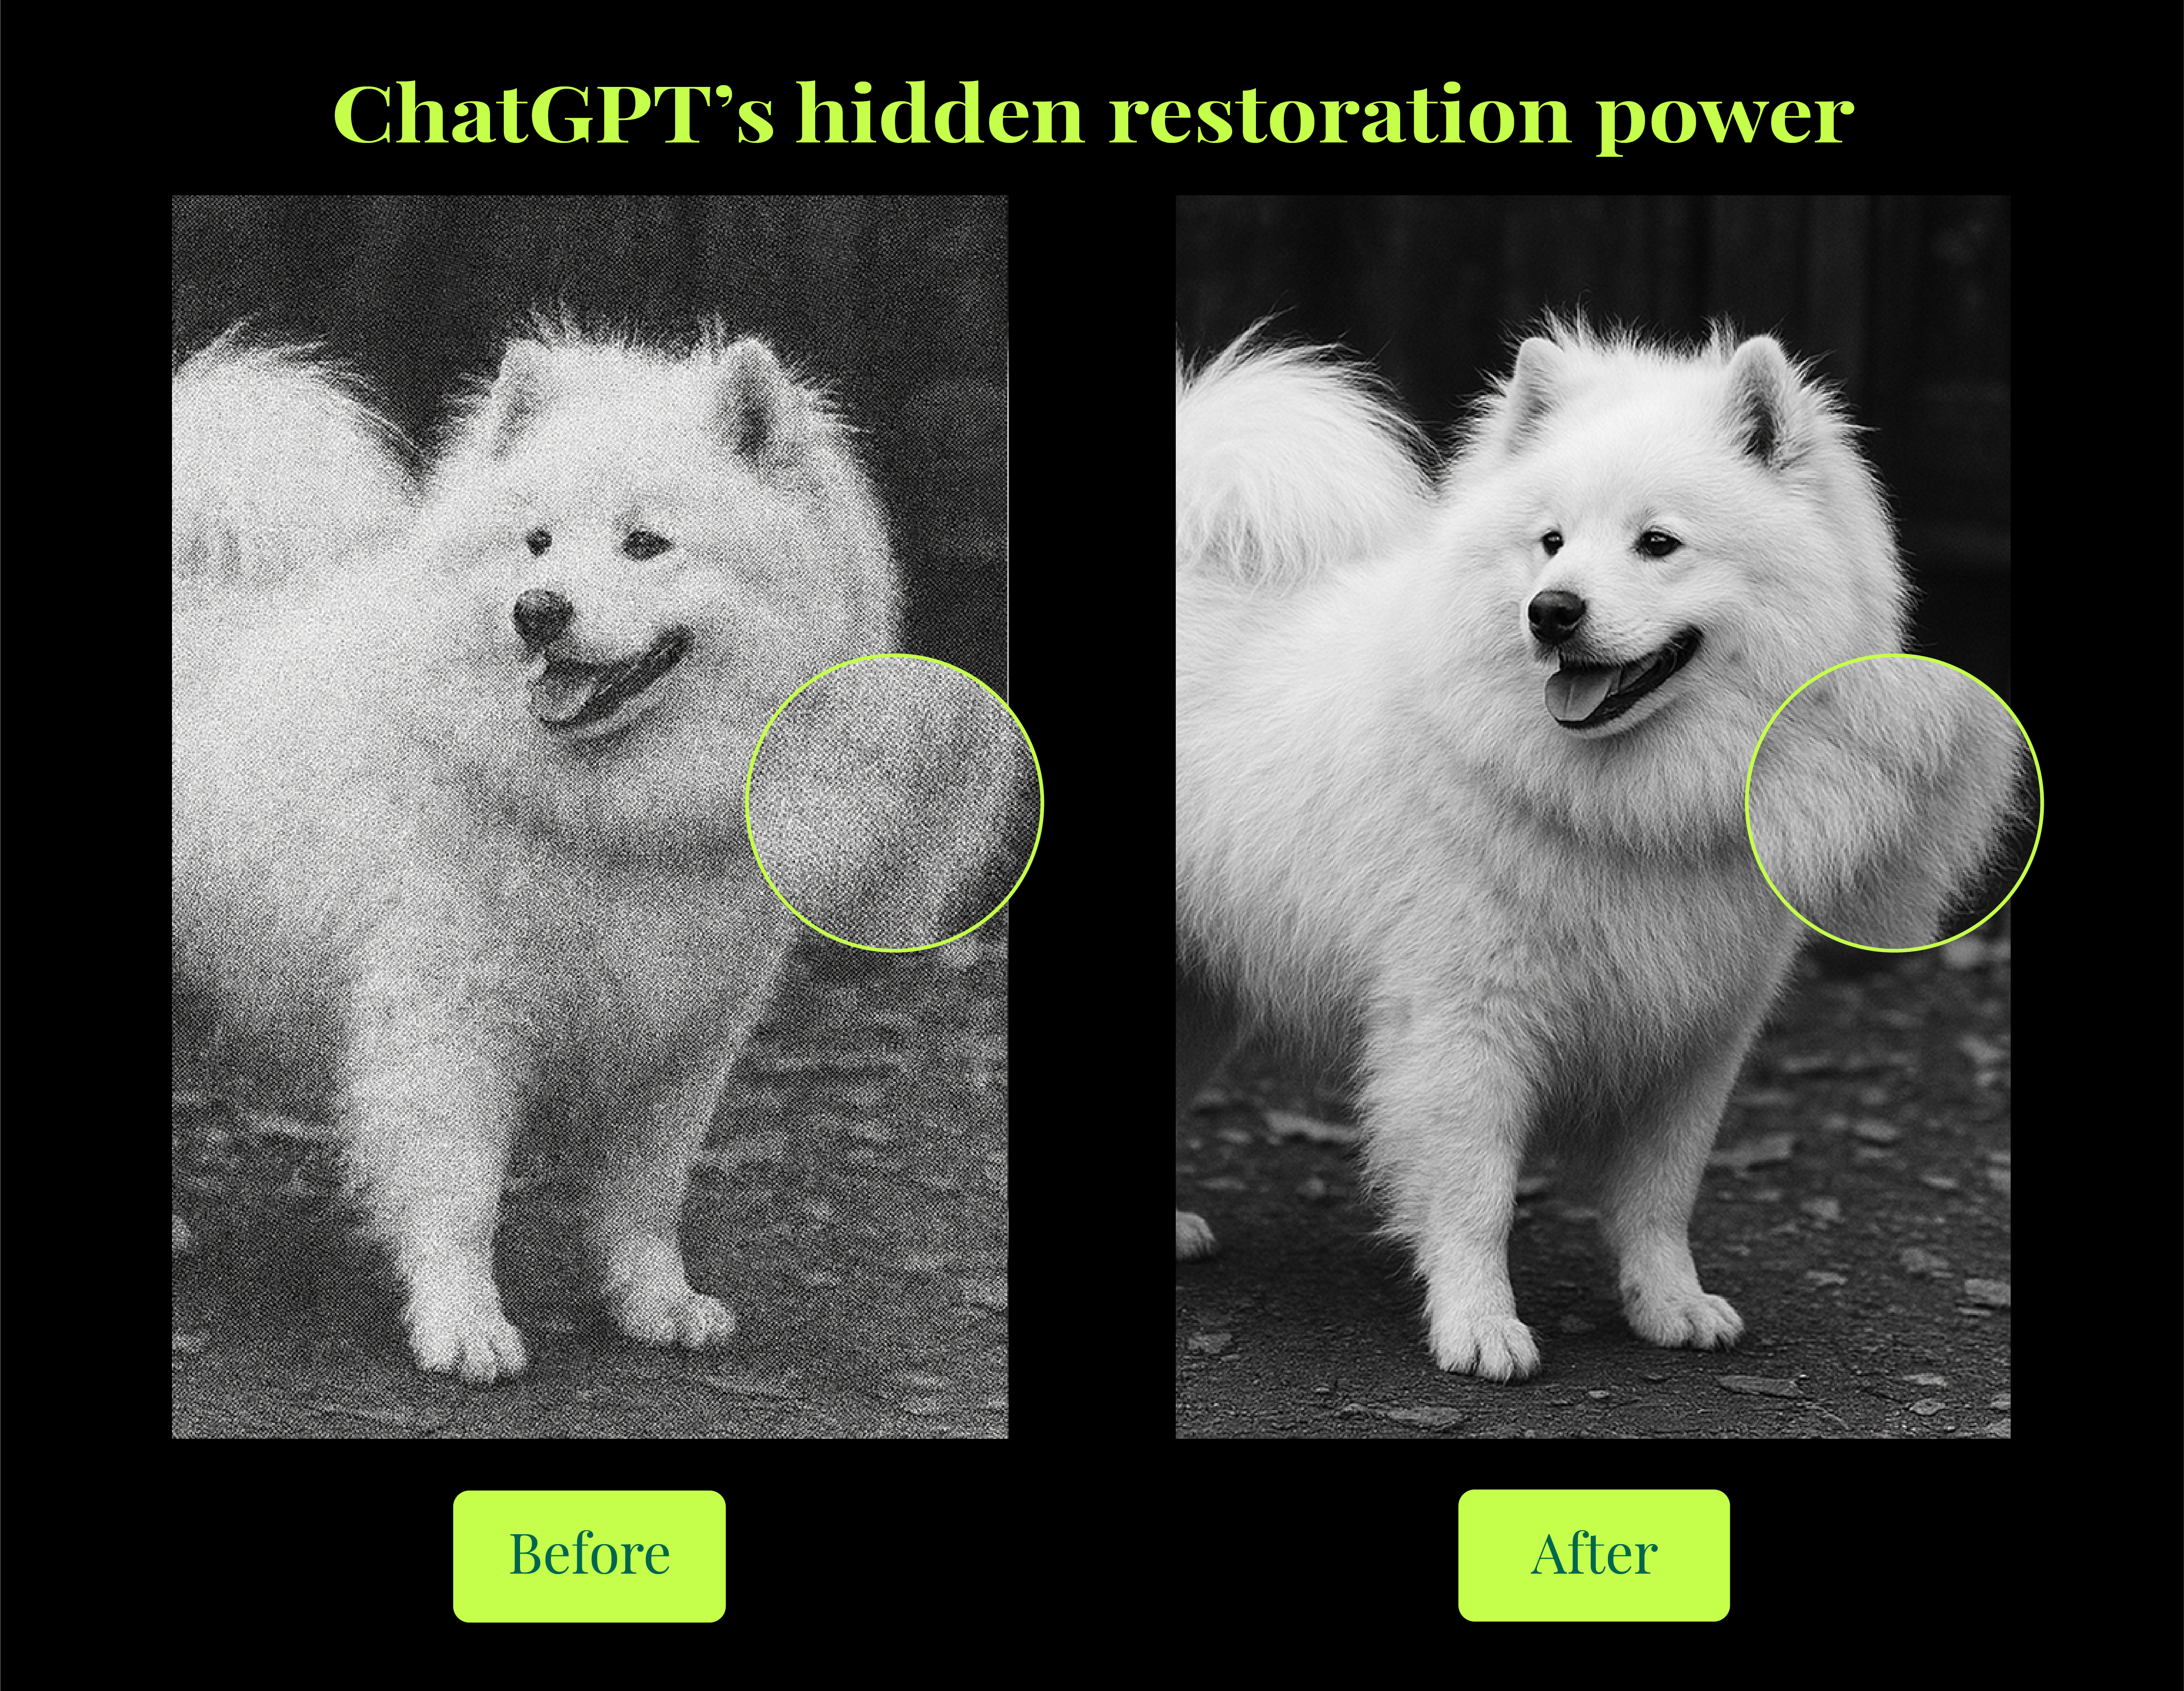
For our experiments, we use photos of Japanese Spitzes. Their white fur and expressive faces make them perfect for testing photo restoration. The contrast between their white coats and dark features really shows how well the restoration works.
Let’s explore how ChatGPT can make your old photos look new again.
How to restore photos with ChatGPT
With recent advancements, ChatGPT can interpret images, refine prompts, and even guide you through complex restoration steps:
- Multimodal transformer capabilities: ChatGPT’s neural architecture can integrate text prompts with image features, providing context-aware suggestions for restoration.
- Self-attention mechanisms: Ongoing improvements allow ChatGPT to cross-reference user feedback and existing pixel data.
- Zero/few-shot adaptation: ChatGPT can adapt to various image styles and restoration tasks with minimal examples.
The standout feature of our workflow is ChatGPT’s capacity to process and enhance images through interactive dialogue. Instead of plugging in a single command and hoping for the best, you get a dynamic conversation where ChatGPT iterates on your requests and feedback.
Step 1: Prepare a photo
Scan or take a clear picture of your old photo. Make sure the image is well-lit and as clear as possible. Save it in a common format like JPG or PNG
Step 2: Upload the photo
Start a new chat in ChatGPT. Click the paperclip icon to upload your photo. Wait for ChatGPT to process the image
Step 3: Write a clear request
Keep it simple with instructions like:
“Please restore this old photo of my Japanese Spitz”
“Fix the tears, scratches, and faded colors in this picture”
“Enhance the clarity of this vintage dog photo”
You can provide ChatGPT with a short description of the dog’s fur color, shape, and any known historical context. For instance, if you know the photo is from the 1940s, ChatGPT might subtly maintain the vintage aesthetic while removing common artifacts like scratches or stains.

Step 4: Give specific details
Tell ChatGPT exactly what needs fixing:
“Restore the missing fur on the left ear, maintain the natural fluffy texture, and adjust the brightness around the eyes.
ChatGPT will respond with a plan – sometimes proposing two or three ways to approach it.
You can also use internal ChatGPT mechanisms to control generation. By specifying token patterns (e.g., “spitz_fur_left_ear: +++priority+++”), you can influence the attention on critical regions.
ChatGPT can output diffusion model hints if integrated with an external rendering pipeline, allowing more finely tuned texture overlays.
Step 5: Review and refine
Don’t like the first pass? Tell ChatGPT! The model can refine hue, contrast, or shape details based on your real-time feedback. For example: “The colors look better, but can you make the dog’s face clearer?”
Step 6: Save the result
When you’re happy with the result, download the restored image.
The power of ChatGPT is in the conversation – you can keep refining until you get exactly what you want, without needing any technical skills or special software.
Limitations of ChatGPT
While ChatGPT offers impressive photo restoration capabilities, our extensive testing revealed several limitations that serious restoration projects need to address:
- Fine details (e.g., individual fur strands) may be oversmoothed or hallucinated, especially on high-res inputs.
- It sometimes introduces modern hues instead of preserving vintage color palettes, especially in sepia or heavily faded shots.
- When significant areas are missing, generated reconstructions may be visually plausible but factually wrong.
- It struggles with patterns like mold, heavy tears, or layered deterioration — producing smears or surreal fills.
- Large images may be compressed or processed at reduced resolution, resulting in softened results.
- Features like grain matching, film stock simulation, or texture-aware sharpening aren’t part of ChatGPT’s native tool set.
Our team’s experience with Japanese Spitz photography has taught us that while ChatGPT provides an excellent starting point, achieving truly professional results requires a more comprehensive approach.
In the following sections, we’ll share our proven workflow that combines strategic pre-processing before using ChatGPT and professional upscaling techniques after it finishes restoration.
Image pre-processing
Before ChatGPT gets involved, we apply targeted pre-processing to make the image easier for the model to interpret. Our pipeline includes:
- Noise reduction using BM3D: Helps remove chromatic and luminance noise while preserving texture.
- Descreening to eliminate halftone and moiré patterns: Especially critical for scanned images, this step flattens distracting artifacts that could confuse the AI.
- Color balance adjustments: Restores natural tones and helps ChatGPT avoid overcorrecting faded areas.
- Contrast and shadow normalization: Creates a more consistent tonal baseline for restoration prompts.
The goal is a cleaner canvas – less noise, more structure – making ChatGPT’s job easier and the final results cleaner.

Image before pre-processing

Image after pre-processing
Advanced upscaling
After ChatGPT finishes restoration, we run the image through advanced upscaling to recover clarity and prep for archiving or printing. Here’s how we go beyond “just making it bigger”:
- Super-Resolution GANs: We use ESRGAN-based models to upscale images by 4× or 8× with learned texture synthesis that preserves fur and facial detail.
- Edge-aware interpolation: Keeps outlines (like the dog’s ears or snout) sharp by focusing on contour transitions.
- Adaptive kernel selection: Instead of using one filter across the image, our tool dynamically switches between Lanczos, Bicubic, and custom convolution kernels depending on content.
For domain-specific fidelity (like dog breeds), we can use LoRA and Textual Inversion to inject subtle knowledge into upscaling to preserve patterns like fur texture.
For large-scale pipelines, we can use automated tuning loops to optimize output quality across many restoration types.
And, when saving your restored images, for lightweight sharing, H.264 works. But for archival quality (especially if further editing is planned), ProRes or PNG preserves more detail.
Measuring authentic restoration
How do we know if a photo restoration is truly successful? We use a proprietary neural metric that analyzes:
- Fur density: Compares the restored fur pixel distribution to a reference model.
- Color fidelity: Checks if the restored colors match typical Japanese Spitz shades (pure white, subtle cream, etc.).
- Subject integrity: Ensures the dog’s silhouette and facial proportions remain correct.
- Overall aesthetic appeal: A combination of clarity, brightness, and contrast as judged by a specialized neural network.
We then compare results across different restoration methods using:
- Neural style transfer check: We run a side-step check to confirm that the fur style is consistent with actual spitz references.
- Generative adversarial validation: We sometimes pit our final images against a discriminator that’s been trained on spitz images to see if it “thinks” the restoration is real.
- Longitudinal quality tracking: Each iteration logs metrics so we can refine our pipeline over time.
Our results? Dramatic improvements after integrating ChatGPT. No more guesswork – just data-driven validation that proves how effective these AI-enhancements are.

The low-quality input image resulted in ChatGPT generating numerous visual artifacts. It incorrectly interpreted them as intentional stylistic elements rather than defects.

The result we got with the combination of image pre-processing, ChatGPT restoration, and upscaling.


Putting it all together
So, if you want to achieve better results with photo restoration, try this approach:
- Gather your vintage photos.
- Perform pre-processing.
- Prompt ChatGPT with a description of what needs fixing and how you’d like the image to look.
- Iterate based on ChatGPT’s suggestions – ask for changes until you’re satisfied.
- Apply upscaling to boost resolution and clarity.
- Evaluate the result using our neural metric (or your own checks).
- Show off your beautifully restored images – print them, post them, or keep them safe for future generations
The combination of ChatGPT and high-end upscaling isn’t just a gimmick – it’s a genuinely powerful way to breathe new life into old photos. With the right prompts and a bit of patience, you can seamlessly restore your cherished images.
And for those of you hungry for deeper technical challenges, this pipeline can be extended to other tasks, from colorizing black-and-white photos to reconstructing severely damaged images.
Ready to transform your vintage photos?
Take your photo restoration beyond ChatGPT’s capabilities. Subscribe now to be first in line when our specialized pre-processing and upscaling tools launch.
✓ Achieve superior detail preservation
✓ Restore authentic colors with precision
✓ Save hours of manual editing time
✓ Perfect for treasured family photos and historical collections
Leave a Reply